Thursday, June 30, 2011

Flour Tortillas ~ delicioso!

                                                              
I think making your own flour tortillas is the easiest and one of the most satisfying breads to make! Not only that, BUT you won't find a tastier tortilla anywhere!! Also, they are thick and filling! With store bought tortillas, my husband will have 2 (at least) burritos. With mine, it's 1 and done! I can't say enough goodness about them!!
I make my tortillas BIG when making them for burritos. Here is my recipe -
As always, I used my handy dandy mixer, with this attachment. Mixers really make cooking easy!
Ingredients: 4 cups of all purpose flour
a teaspoon of salt
2 teaspoons baking powder
2 tablespoons LARD
OK, side note here. You can use shortening for this. I, however, LOVE to use bacon fat I store away into used (and cleaned out) coffee cans. I save bacon fat, chicken fat, all that good stuff! You can use it as lard, or in place of shortening (it tastes fabulous in a pie crust you're using for a pot pie. DO NOT use it for a sweet pie, though. Veggies taste WONDERFUL tossed in chicken or turkey fat, sprinkled with salt and pepper and broiled!!) OK, back to the list
1 & 1/2 cups water.
Put the flour in the mixing bowl. Add all the ingredients EXCEPT the water. Turn your mixer on stir and let that all mix up (will be crumbly). Add the water a few drips at a time until the dough is moist and sticking together. You may not need to use all the water. You just want the dough sticking together enough to form it. That's it.
Heat some oil in a frying pan (I use cast iron - I love my cast iron!). Put the heat on medium high.

Take out some dough a bit at a time (experiment with different sizes til you can eyeball how much you want or need). Flour your surface and a rolling pin. Toss the dough in the flour a little, then start to roll it out. Roll it out like you would a pie crust, making a circle. Make them AS FLAT AS POSSIBLE. They will puff up!
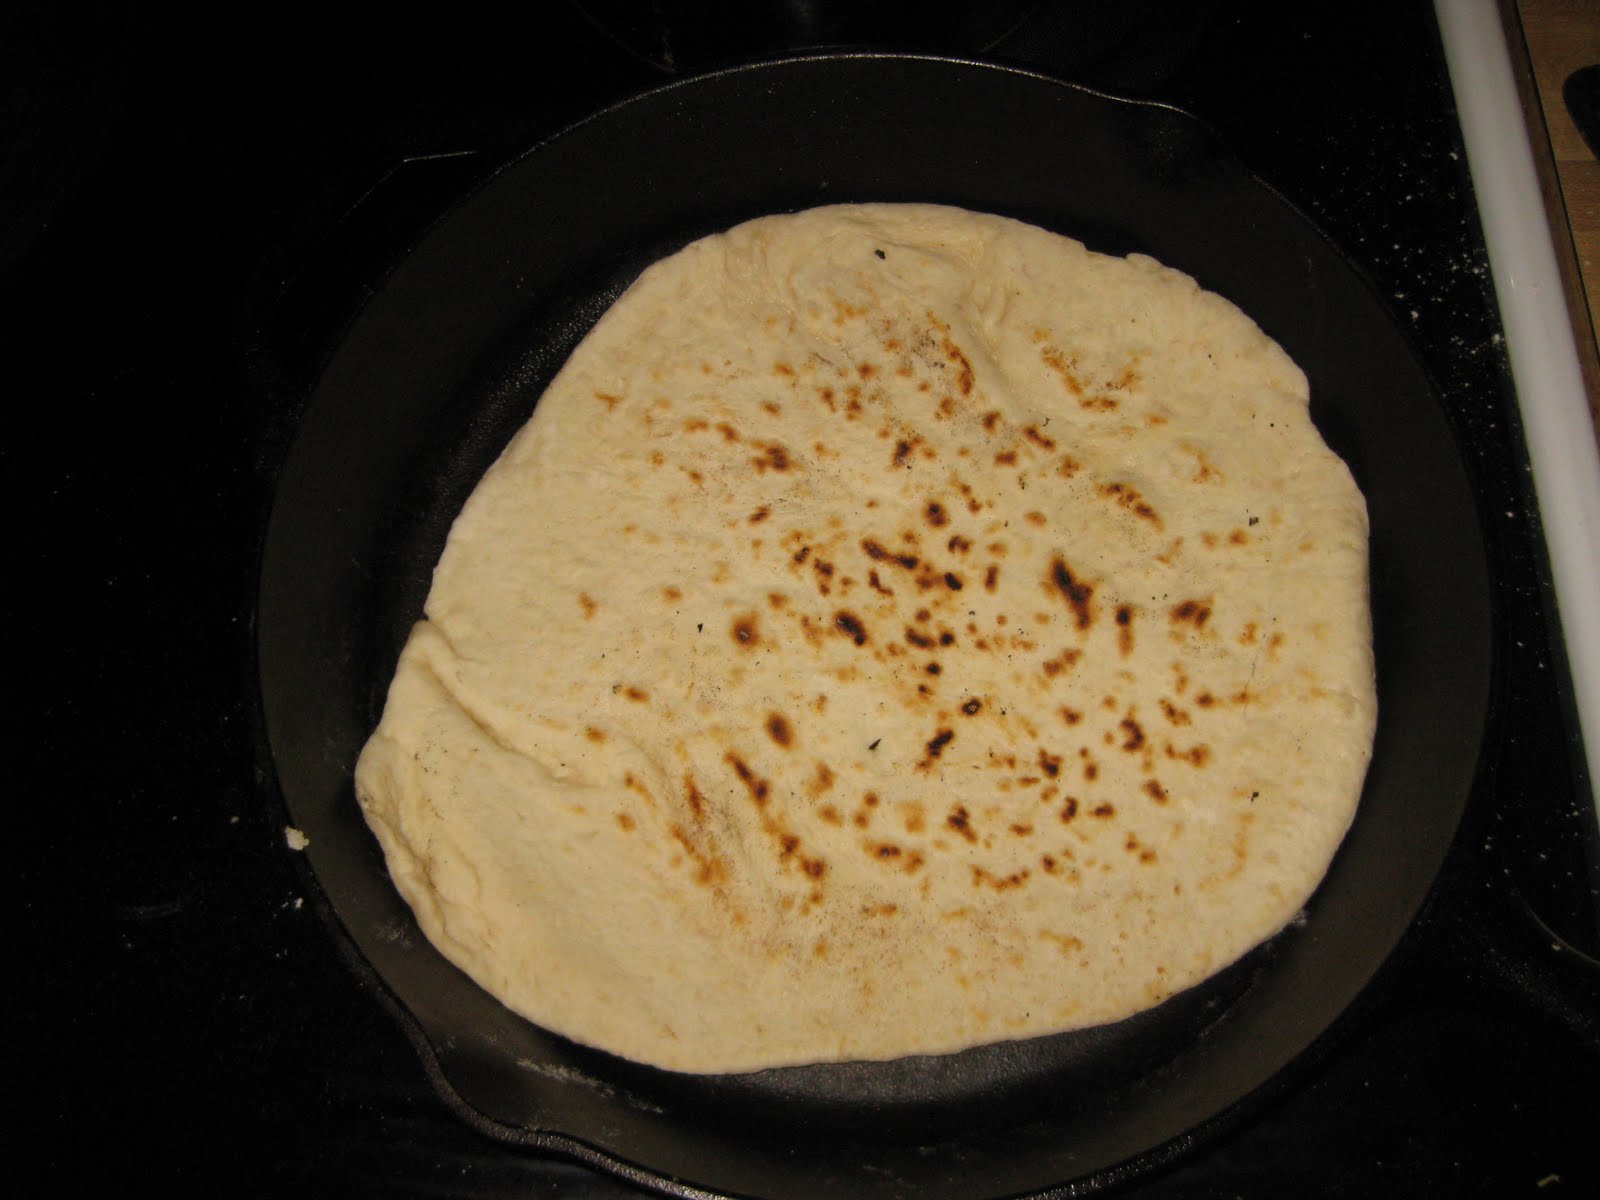
When it's as thin as you want it, plop it in your frying pan. You'll only need to fry it about 5 minutes or so. Then flip it and cook about 3 minutes or so. You'll need to experiment with this one, as I don't have an exact time.
After that, remove your tortilla from the pan, place it on a plate and make the others. You can wrap it up and save it for later, or just fill it and serve them fresh! Mmmm, fantastico!

Monday, June 27, 2011

Mom's Mint Iced Tea


Summer also reminds me of my Mom's mint iced tea, made with fresh mint from the garden! My Mom used to make this for us every summer, and we LOVED it! I now make it for my kids and they drink a whole pitcher in just a couple days! Here's my recipe:

I use Lipton decaffeinated tea bags for the tea.


                                                       And fresh mint from my "garden".
                                                      You will also need: 1/4 cup Lemon Juice
                                                                                       1 cup of sugar

In a 2 cup measuring cup, put 6 tea bags in and 3 "stalks" of mint (I put the whole thing in, not just the leaves). Fill the measuring cup with boiling water and let it steep for 1 hour. When the hour is up, take out your leaves and tea bags and add your tea to your pitcher (I use a 2 quart pitcher). Add 1/4 cup lemon juice, and about 1 cup of sugar (or less if you like it less sweet). Then add cold water to fill your 2 quart pitcher!  That, my friends, is IT! You kiddos will LOVE this tea, and probably your husband too! (I pretty much GUARANTEE IT!)

Sunday, June 26, 2011

Summer is for Blueberry Pie!

I love making Blueberry Pies in the summertime! The blueberries are sweet and ripe, and usually on sale at the grocery store, so you can buy a bunch for your pies! Here are the ingredients I use for my pie, and how I make it! I also make the crust, as you can see below! First off is my crust recipe. Very VERY simple to make (the hardest part, in my opinion, is rolling the dough out).

Pie Crust:
 2 cups flour
1 teaspoon salt
2/3 cup plus 2 tablespoons shortening
4 to 6 tablespoons cold water, 1 tablespoon at a time

This is the attachment I use for my pie crust dough. For bread doughs and pizza crust I usually use my dough attachment, but for my pie crusts, this attachment works the best. (I don't know what I would do without my trusty ol' mixer!) I add all the ingredients except the water. Mix your dough in the stir setting or even the #2 setting. Add your water 1 tablespoon at a time until the dough sticks together and the bowl is clean. See the picture below.

 
Now your crust is done. It may look and seem a little crumbly, but you want it that way. Too moist and it will stick all over your surface and won't roll nicely. You are going to divide this dough in half. Half for the bottom crust, half for the top.

You want to roll this dough as thin as you can, WITHOUT breaking it. I put a little flour on my surface and a little flour on my rolling pin. As you roll it out, flip it (gently) a couple of times. I do this to make sure it isn't sticking to my surface. I also break off any jagged edges that are much longer and add them back to the middle of the pie crust, flip it over and roll it. Place your pie crust in your pie plate, then roll the other half of the dough out the same way. Let this dough sit on your surface, until your filling is done cooking.

Blueberry Filling:
8 cups blueberries (4 pints)
1/2 cup sugar
1 tablespoon flour
1/4 cup butter (half a stick)

Take half of your blueberries and add them to a big pot with your sugar and butter. The other half you will will mash (raw) with a potato masher or fork or whatever you like. After the pie filling is done cooking, you will add the two together and stir.

When you first put your blueberry ingredients into your pot, this is what they will look like. But as the mixture gets hotter, it will all dissolve, and look like what you would find in a can of blueberry pie filling. I crush the blueberries in the pot a little as I stir.
After you've added your raw, smashed blueberries to your cooked filling, add it to your pie crust!

                                                        Doesn't that look DELISH!

After filling your pie shell, you want to add your other rolled pie crust to the top, sealing the edges together and cutting some slits in the top crust for ventilation. Be as fancy or as primitive as you wish!

You want to bake this pie at 350 degrees for between 30 and 40 minutes (until the crust is golden brown). I want to warn you, put a cookie sheet on the rack under your pie, because the filling will drip out! If you want the pie to be set and thick, make it a day ahead of time and refrigerate it. Otherwise it's runny when it's warm (but still tastes amazing!). I like to have a big ol' slice of this pie with some french vanilla ice cream! Enjoy!


Thursday, June 23, 2011

DIY Laundry Detergent


This laundry detergent is easy to make AND lasts a very long time! Here's what you need: a large pot (used only for making detergents from now on), Large wooden spoon (only for detergents), Arm and Hammer Washing Soda, 20 Mule Team Borax, and Fels Naptha (it's a bar soap in the laundry detergent isle. You can find the washing soda and Borax in the laundry isle as well!). And lastly a container to store your detergent. I use a medium sized Tupperware container. This recipe makes 2 gallons, so make sure it is large enough! You could use a 5 gallon bucket (ask your local bakery or bakery department at the grocery store. They give them away, because they do not reuse them.)
These ingredients are NOT expensive to purchase, and they last you a LONG time! We bought our ingredients back in the winter (January?) and we still have PLENTY left. In fact, the only thing we will need to replace, maybe in a couple months, is the Fels Naptha which only cost us .99 cents!! Here's the recipe -
1/3 bar Fels Naptha , 1/2 cup washing soda , 1/2 cup borax , water.
Grate 1/3 of your Fels Naptha bar into your large pot and add 6 cups cold water. Bring to a boil, and boil for 15 minutes, stirring frequently. Remove from the heat and immediately add the washing soda and borax. Stir until everything is dissolved. You're going to add enough cold water to this mixture to make 2 gallons. We add some water to our container first, then add the hot detergent mixture, and the remaining cold water (to keep our container from warping from the heat).
The mixture will be VERY watery. You have to let it sit 24 hours before using it. The next day it will be a gel on top and liquid underneath. I usually give it a good stir to mix it all up.
You want to use 1 cup of laundry detergent for large loads (sometimes I add a little more for good measure). This detergent works great and is SO cost effective! Happy Washing!

Wednesday, June 22, 2011

My Home Made Ant Trap!


Hello again! We recently had a bunch of ants in our house! We had small ant on the kitchen counter tops, coming in from various places, and ants in our sun room. The ants in our sun room were little ants on the floor AND flying ants looking to colonize. I looked up a recipe for an ant trap that was as follows - 1 tablespoon Borax to 3 tablespoons sugar. Mix with a little bit of water (a little soupy) and add a teaspoon of peanut butter.
I tried this recipe, and to my disappointment it did NOT work for me. SO, I decided to make my own concoction up. I used 1 tablespoon borax to 2 tablespoons sugar and added a few drizzles of honey. I dripped some directly onto my counter top in the kitchen. I cut one part of an egg carton (1 hole for an egg) and filled it with my mixture for my sun room. Not only did the ants eat this stuff right up, they also have NOT been back since!! I think maybe the borax might have been diluted too much in the original recipe.
Let me just note, if you have children or pets make sure you DO NOT let them touch or eat this stuff!
If you have an ant problem, I hope this helps. It really worked for me!

Thursday, June 16, 2011

I'm Trying My Hand At Starting Sourdough!

A friend of mine over at Cultured Mama posted yesterday how to make a sourdough starter. I told her I was surprised (and maybe a little confused) at how SIMPLE it is to make your own sourdough. It's simply a mixture of (warm) water and flour! The process is long (seems about 3 days) to begin, BUT it's not labor intensive at all! It's just a matter of waiting (I guess if you have issues with patience, this may be hard. Sit down, say a prayer for some patience and jump in!). Anyways, I started my sourdough starter today! I will post pictures as I go, so you can see what to expect! Right now I did 1/4 cup nice warm water, and 3 coffee scoop scoops of flour. It's about 6 tablespoons. Cultured Mama has an article on her page that is a bit more in depth with the recipe. Tomorrow I will see if there are any bubbles. If not I wait a little longer and if still no bubbles, chuck it and start again. If there are bubbles I add another 1/4 cup of water and another 3 scoops of flour. By the way I'm using all purpose, because it's what I had on hand. So you can see my picture of what my sourdough starter looks like about 15 minutes after I mixed it and I am letting it sit on my windowsill until tomorrow morning!

Wednesday, June 15, 2011

Chicken With Pasta and Veggies

Hello again! This is a quick and easy recipe, good for a warm summer night. Just see what veggies you might have on hand to use in addition to what I put in. This recipe made 2 dinners for a family of 5, and it's pretty cheap to make!

                                                        Chicken With Pasta and Veggies

Chicken breasts (I had 3 that I took out of the freezer)
paprika, salt, thyme, garlic powder and onion powder to season the chicken.
Bow tie Pasta (you can get this cheap at any discount grocery store)
about 2/3 cups cherry tomatoes cut in half
about 2 cups fresh spinach (washed but don't bother chopping)
1 larger zucchini, coarsely chopped
1 small package of whole fresh mushrooms, quartered
1 small onion, cut into chunks
about 1 cup (or so) green beans (I used frozen)
olive oil (or whatever oil you choose) to toss the veggies in before baking
rosemary, sea salt, basil, parsley and oregano to taste for the veggies
Parmesan cheese to garnish

Preheat your oven to 375. Season your chicken and bake it on a cookie sheet (lined with tinfoil for less mess) for about 40 minutes.

When the chicken is done, remove, let it cool and coarsely chop. On the SAME cookie sheet (don't remove the tin foil please), add ALL your veggies. drizzle with oil and season them. I reuse the cookie sheet because you'll also get some of the yummy drippings mixing in with your veggies and that will help flavor them in addition to your herbs!

I didn't bake them for any certain amount of time, I just kept an eye on them to see if the spinach was wilted and the zucchini is soft, not raw and crunchy.
Meanwhile, boil your bow tie pasta according to the package (it's usually about 7 to 9 minutes), in a large stock pot. I always add some salt to my water. It seems to keep it from boiling over, but not all the time. When your pasta is done cooking, drain it and put it back into the stock pot. Add your veggies and chicken to the pasta and stir. Serve immediately and garnish with Parmesan cheese (as much as you like!). You can have some bread to go along with it (homemade is fabulous, but that's another recipe!), or you can eat it alone.

Enjoy!